open file

convert to hex presentation
:%!xxd

editing in hex format
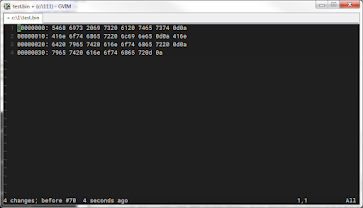
convert back to see what is changed
:%!xxd -r

convert to hex presentation
:%!xxd
convert back to see what is changed
:%!xxd -r
PAT is personal access token
git remote remove origin
git remote add origin https://[pat]@github.com/[username]/[project].git
Ok hostinger not work for me.
purchased a domain "dsmarkchen.com" from godday instead
to check dns:
dig www.dsmarkchen.com +nostats +nocomments +nocmd
|
|
Canto 9 |
Meaning |
|
19 |
in
dream I seemed to see an eagle poised, |
Eagle:
spiritual flight, Saint Lucy (light) |
|
|
And
I seemed to be there where Ganymede |
|
|
|
Within
myself I thought: “This eagle may |
|
|
|
found
elsewhere.” Then it seemed to me that, wheeling |
Lightning:
eagle usually associate with lightning (thunderbolt, means knowledge) |
|
|
And
there it seemed that he and I were burning; |
Burning
(in the fire):purify (the sins) |
A New Persective On Dante's Dream of Siren is a wonderful article that I discoverred recently.
It covers the second dream in purgatorio, it provides a key to understanding divine comedy as a whole.
(To me, all three dreams in purgatorio are fascinating.)
|
|
Canto 19 |
Meaning |
|
7 |
a stammering woman came to me in dream: |
Not
to be loved |
|
10 |
I
looked at her; and just as sun revives |
gaze |
|
13 |
set
her contorted limbs in perfect order; |
Projected
love |
|
16 |
And
when her speech had been set free, then she |
Can't
escape |
|
19 |
“I
am,” she sang, “I am the pleasing siren, |
|
|
22 |
I turned aside Ulysses, although he |
Siren
change songs to fit the desire of hearers |
|
25 |
Her lips were not yet done when, there beside me, |
Lady
(reason, power of free choice) |
|
28 |
“O Virgil, Virgil, tell me: who is this?” |
|
|
31 |
He seized the other, baring her in front, |
Belly
(Dante's desire) |
|
|
Canto 19 |
Meaning |
|
58 |
“The one you saw,” he said, “that ancient witch— |
How
man can free her? |
|
61 |
Let
that suffice, and hurry on your way; |
Lure
(Beatrice) |
The author identify false images and true image (Beatrice), and argues that true image "drives the lover to investigate his desires".
The article (or the author) tries to use reason to exaplain true image, which will eventually fail. I still view the Beatrice image as esthetic image.
The pandemic of covid-19 in Alberta is rocking everyday, today was 1500, yesterday 1300, the day before 1100. Where is the ceiling? But my wife is my light, we have a little conversation this morning. If the life (virus) want to take your life, you can't avoid but have to accept it. Shouldn't depend the master's super power to heal the disease, or reciting the mantra or buddha's name to get rid of it. That's the spirit of "Love your fate!"
Dante has rely on the heavenly Marie and Beatrice, with this super natural power, he can't be defeat in seeking the source. James Joyce follows him, in Ulysses at the beginning that milk women acted like Athena (from my teacher Joseph Campbell). I am such a stupid head, I disdained that milk women as poor with no hope.
I have a little meditation this morning. My mind is contemplating what to focus of the meditation topic, not on "who recite the buddha's name", as by my master in cttb originally said you have to find a good question to contemplate a few years ago. As I go though divine comedy of Dante (mostly in inferno), James Joyce, and Joseph Campell. There's some words from Joe, "I have say no all my live...", then I have a little thought of that say 'yes'. After meditation, is breakfast time, toast and coffee. I've chance to open Ulysses, the last page and the last section, to read. That is the start of my day. And a good day. Yes.